7 Tips for Choosing Solar Mounting Structures?

Time:2026-10-10 Author:Henry
0%

Solar PV is expanding rapidly, but panels alone do not make a reliable project. The International Energy Agency reported approximately 420 gigawatts of new solar capacity in 2023. That growth increases pressure on developers to select stronger, safer, and more adaptable mounting systems. This is where “How to choose solar mounting structures” becomes a practical engineering question.

NREL’s 2024 Cost of Solar Energy Review shows that balance-of-system decisions still influence project economics, installation time, and long-term performance. A roof with fragile membranes needs different attachments than a rocky hillside. Coastal sites demand better corrosion protection. Snowy regions require careful load calculations. Wind zones can turn a small design mistake into a costly repair.

“Solar mounting structures should be selected as part of the whole system, not as an isolated component,” says Andy Walker, a senior engineer associated with the National Renewable Energy Laboratory. The principle is straightforward. The application is not.

This guide examines seven useful considerations, including roof condition, wind and snow loads, material durability, tracking requirements, installation access, maintenance, and total lifecycle cost. It also compares fixed-tilt, ballasted, driven-pile, and ground-screw solutions. A low purchase price may look attractive. It may also hide difficult labor, replacement parts, or drainage problems.

Real projects are rarely perfect. Soil reports can be incomplete. Contractor experience can vary. Even reputable calculations need field verification. These uncertainties deserve attention, not optimistic assumptions. The right structure protects energy yield, workers, equipment, and the owner’s investment over decades.
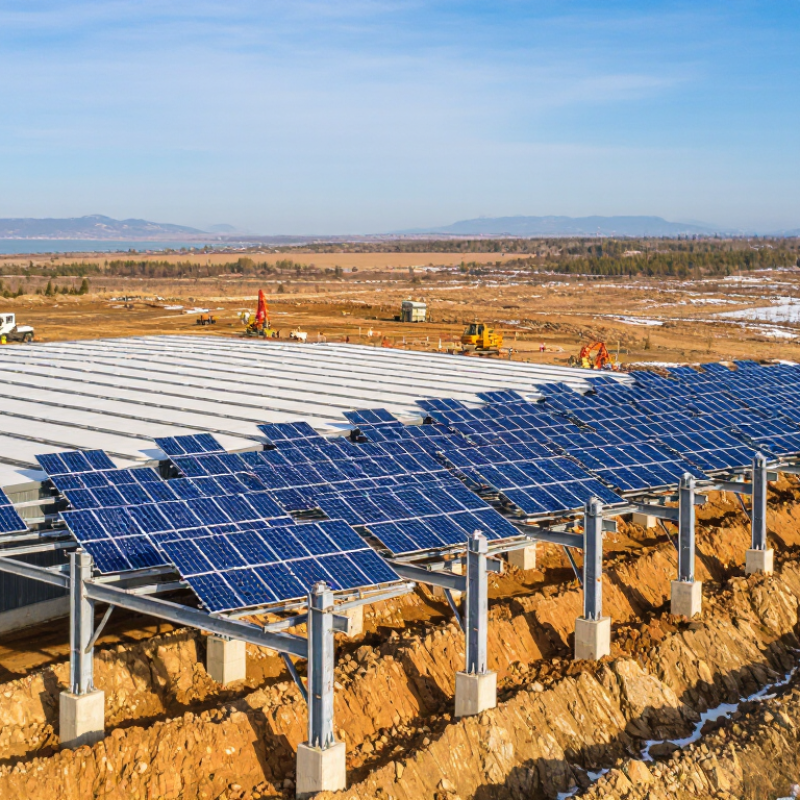
7 Tips for Choosing Solar Mounting Structures?

Assess Roof Type, Load Capacity, and 25-Year Structural Durability

7 Tips for Choosing Solar Mounting Structures

Assess Roof Type, Load Capacity, and 25-Year Structural Durability

Choosing a solar mounting structure starts with the roof, not the panel layout. Identify asphalt shingles, standing-seam metal, tile, or membrane roofing. Each surface needs different attachments and sealing methods. Tile can crack under careless foot traffic. Membrane roofing can fail after poorly detailed penetrations. Check roof age, slope, drainage, and remaining service life before approving the array. Replacing roofing beneath solar equipment is costly and disruptive.

Load capacity requires measured attention. Ask a qualified professional to review dead load, snow, wind uplift, seismic forces, and existing framing. Panels add weight, while racking transfers concentrated forces to attachment points. Do not rely on a generic roof rating. Fastener spacing, purlin condition, and corrosion can change the result. Older buildings need more than photographs. Local building requirements should guide the design, especially in snowy or hurricane-prone regions.

For 25-year structural durability, evaluate material grade, protective coatings, drainage, galvanic compatibility, and fastener quality. Water trapped beneath rails can accelerate corrosion quietly. Request testing records, installation instructions, and a clear structural warranty. Inspect exposed connections after severe storms. Record rust, loosened hardware, or sealant movement. Small problems are cheaper to correct early. No checklist is flawless; experienced teams can still miss hidden timber damage or unsuitable flashing. Recheck assumptions before installation, and preserve access for future roof maintenance.

Choose Tilt Angles Between 10° and 40% for Site-Specific Solar Yield

7 Tips for Choosing Solar Mounting Structures

Tip 1: Treat tilt angle as a site decision, not a fixed formula.

Angles between 10° and 40° can support strong solar yield, but the best setting depends on latitude, roof direction, shading, and seasonal weather. A neat 30° rule sounds useful. It is not always right. On a low-slope roof, 10° may reduce wind exposure and simplify installation. A steeper 35° or 40° angle can improve winter collection, especially where snow is common.

Tip 2: Check the structure beneath the panels.

During site inspections, installers should examine roof materials, purlins, fasteners, drainage paths, and local wind conditions. A carefully selected tilt cannot compensate for weak attachment points. Leave practical access between rows. Technicians need room to inspect cables and clean debris safely. Small gaps matter.

Tip 3: Compare annual output with maintenance demands before approving the design.

Higher angles may improve self-cleaning, yet they can increase uplift forces and material use. Ground-mounted systems also need stable foundations and accurate soil assessment. Solar software can estimate production, but field measurements remain essential. Trees grow, shadows move, and weather records may be incomplete. Recheck the model. A reliable design documents the chosen angle, structural loads, drainage plan, and maintenance access for future reviewers.

Compare Aluminum 6063-T5 with Galvanized Steel for Corrosion Resistance

Choosing Solar Mounting Structures: Aluminum 6063-T5 vs. Galvanized Steel

Tip 1: Match the material to the environment.

Aluminum 6063-T5 naturally forms a thin oxide layer that slows surface corrosion. It is lightweight and practical for rooftop installations. However, salt air can still attack joints, scratches, and trapped dirt. Galvanized steel relies on a zinc coating for protection. The zinc sacrifices itself when exposed, shielding the steel beneath. Its performance depends heavily on coating thickness, drainage, and local weather.

Tip 2: Inspect every connection.

Direct contact between aluminum rails and galvanized steel can create galvanic corrosion, especially in wet coastal conditions. Use compatible washers, isolating pads, and approved fasteners. Keep water from collecting around bolt holes. A small scratch in galvanized steel may become a rust point. Aluminum may look cleaner, but its hidden contacts deserve equal attention. This is easy to overlook.

Tip 3: Consider handling and maintenance.

Aluminum 6063-T5 reduces roof loading and is easier to cut on site. Galvanized steel offers greater rigidity and may suit larger spans or exposed structures. Field inspections should check coating damage, white corrosion products, loose bolts, and blocked drainage. Do not judge durability from appearance alone. Engineers should verify loads, coating specifications, and local requirements before installation. My initial preference for aluminum was too simple; climate, detailing, and maintenance often matter more than the material name.

Verify Wind Loads of 140–180 km/h and Applicable Structural Standards

Wind verification should begin with the project site, not a standard mounting table. A wind speed of 140–180 km/h equals approximately 39–50 m/s. At sea-level air density, this range creates an approximate basic velocity pressure of 0.93–1.53 kPa before exposure, height, turbulence, and shape factors. Actual uplift can be higher around roof edges and corners. A neat spreadsheet can still be wrong.

Use the applicable structural standard for the installation location. ASCE/SEI 7-22 provides procedures for wind speed, exposure category, enclosure, and component pressures. Eurocode EN 1991-1-4 applies similar site-specific principles across many European projects. IEC 62548 also addresses PV array design and installation safety. These documents should be checked together, not treated as interchangeable. IEA PVPS Task 13 reliability reports identify wind-induced uplift, fastener fatigue, and tracker damage as recurring photovoltaic failure concerns.

Ask the engineer to verify rail spans, clamp spacing, ballast movement, anchor pull-out, and member buckling. Check the weakest detail. Coastal sites need corrosion allowances, while open farmland may require higher exposure coefficients than nearby buildings. During inspection, look for loose clamps, distorted rails, and fresh movement marks after severe weather. Torque records help, but they do not replace pull-out testing. I would also challenge the selected 140–180 km/h range; it may describe a gust, a basic wind speed, or a forecast value. That distinction changes the design.

Solar Mounting Structures: Reference Wind Pressure at 140–180 km/h

The chart shows reference wind pressure calculated from q = 0.613V², where V is wind speed in m/s and air density is approximately 1.225 kg/m³ at sea level. These values are preliminary reference pressures; final design must also consider terrain, height, exposure, gust factors, roof geometry, local code requirements, and connection resistance.

Applicable structural references may include ASCE/SEI 7-22 for U.S. wind actions, EN 1991-1-4 for Eurocode wind actions, and AS/NZS 1170.2:2021 for Australia and New Zealand. Select the standard required by the project location and verify the complete load path from modules and rails to anchors and the supporting structure.

Check Compatibility, Drainage, Grounding, and Module Installation Efficiency

Tip 1: Check module compatibility before ordering. Confirm panel dimensions, clamp zones, frame thickness, and maximum module weight. IEA PVPS reported over 440 GW of new solar capacity in 2023, increasing the variety of module formats. A rail that fits one panel may damage another.

Tip 2: Review wind and snow loads using the project’s location data.

Tip 3: Leave clear drainage paths beneath each module. Standing water can collect dust, accelerate corrosion, and stain roof surfaces. A small gap matters. Field inspections often reveal blocked channels after installation.

Tip 4: Match roof attachments with the substrate, not only the mounting rail. Timber, concrete, and metal decks require different fasteners and pull-out checks.

Tip 5: Plan grounding and bonding before installation. The National Electrical Code requires reliable electrical continuity, while NREL reliability studies identify wiring and connection faults as important photovoltaic failure sources. Use listed grounding hardware and verify continuity with a meter.

Tip 6: Choose structures that reduce cutting, drilling, and repeated lifting. Accurate pre-assembly can shorten installation time and reduce handling damage.

Tip 7: Inspect module placement, clamp torque, cable routing, and ventilation during commissioning. IEA PVPS reliability guidance links installation quality with long-term performance, although field conditions remain unpredictable. Perfect planning is impossible; a second inspection is still worthwhile.

FAQS

Which material offers better corrosion resistance for solar mounting structures?

Aluminum 6063-T5 forms a thin oxide layer that slows surface corrosion. It is lightweight and suits many rooftops. However, salt air can attack scratches, joints, and trapped dirt. Galvanized steel depends on its zinc coating, drainage, and local weather.

Is aluminum always the better choice near the coast?

No. Coastal moisture can damage aluminum connections and scratched galvanized coatings. Use isolating pads, compatible washers, and approved fasteners. Inspect hidden joints carefully. Appearance can mislead.

Can aluminum and galvanized steel touch directly?

Direct contact may cause galvanic corrosion, especially in wet coastal conditions. Separate the metals with suitable washers or isolation pads. Prevent water from collecting around bolt holes. This small detail matters.

How should galvanized steel be inspected for corrosion?

Check for coating damage, white corrosion products, scratches, and early rust points. Inspect drainage paths after rain. A small scratch may expose the steel underneath. Do not judge durability by appearance alone.

What wind range should the mounting structure withstand?

A range of 140–180 km/h equals roughly 39–50 m/s. Basic velocity pressure may reach approximately 0.93–1.53 kPa. Actual uplift can increase near roof edges and corners. The stated wind value needs clarification.

Which structural checks are important for strong wind conditions?

Verify rail spans, clamp spacing, anchor pull-out, ballast movement, and member buckling. Check the weakest connection, not only the main frame. Inspect loose clamps and fresh movement marks after storms. Torque records help, but they do not replace pull-out testing.

How can drainage improve mounting system durability?

Leave clear gaps beneath modules for water to escape. Blocked channels can collect dust, accelerate corrosion, and stain roof surfaces. Inspect drainage after installation. A small gap matters.

What should be checked before ordering modules?

Confirm module dimensions, frame thickness, clamp zones, and maximum weight. Rail compatibility varies between panel formats. Also check roof materials and attachment methods. Timber, concrete, and metal decks need different fasteners.

How should grounding and installation quality be verified?

Plan grounding and bonding before installation. Use listed grounding hardware and test electrical continuity with a meter. Inspect clamp torque, cable routing, module placement, and ventilation. Perfect planning is unlikely. A second inspection is worthwhile.

Conclusion

How to choose solar mounting structures depends on the roof or ground conditions, local climate, and the expected service life of the solar system. Start by identifying the roof type, checking its load-bearing capacity, and selecting a structure designed to maintain stability for at least 25 years. The tilt angle should be adapted to the site, generally within a range of 10° to 40°, to improve solar yield while considering wind exposure, roof space, and drainage requirements.

Material selection is also important. Aluminum 6063-T5 offers a lightweight and corrosion-resistant option, while galvanized steel provides high strength and durability when properly protected. Confirm that the structure can withstand local wind loads of approximately 140–180 km/h and complies with applicable structural and electrical standards. Finally, check module and roof compatibility, water drainage, grounding provisions, and installation efficiency. A well-designed mounting system should simplify installation, reduce maintenance, protect the building, and provide reliable long-term support for the panels.

Henry

Henry

Henry is a dedicated marketing professional with a profound expertise in the company's offerings. With years of experience in the industry, he possesses an impressive understanding of the market dynamics and consumer behaviors that drive success. Henry is committed to sharing his insights through......